|
The Main tab of the Prospect window can be used to manage your database of prospects. It contains the list of all prospects and their profiles.
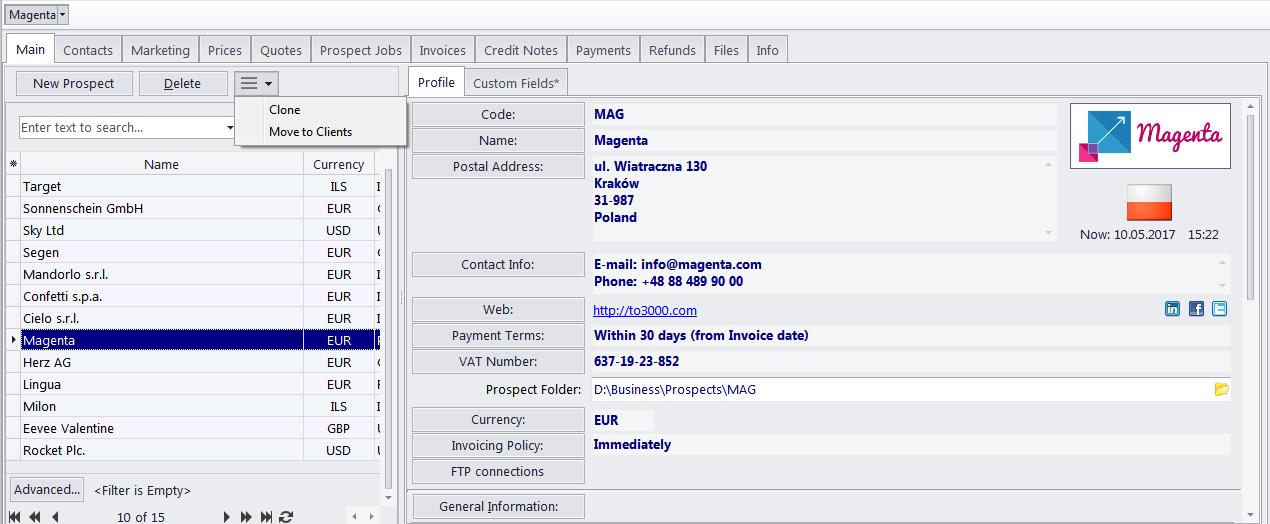
Browsing prospects You can search for specific prospects using the Find panel. Enter a few characters from the prospect's name, or any other column displayed in the table, and the table will show only the entries that contain the entered characters. Click on any prospect in the list to view and edit the prospect's profile to the right. Once a new prospect has been added, their data can be edited in this profile. You can create a new prospect record based on the data (profile, marketing, contact or pricing) of one of the existing prospects by cloning this prospect. To do so, select a prospect to clone, click the More... button next to the Delete button, and select "Clone" Once you strike a deal with a prospect and they become a full client you can transfer them into the Client database. Click the More... button and select "Move to Client". You can delete a prospect and all data related to this prospective or former client (quotes, projects, jobs, invoices, etc.). To do so, select a prospect to delete, and click the Delete button. Each prospect entry can have a flag assigned to it. The prospect's flag can be changed by right-clicking their entry and selecting a flag. prospects are listed in the form of a table. You can change the columns displayed in the table by using the Customize Columns option.
Prospect profile On the right side of the Main prospect tab, you have two tabs: Prospect Profile and Custom, which enable you to review and modify the prospect’s information. Click appropriate button to add or edit prospect profile information: ·Code — click this button to enter or change the prospect’s code (15 characters maximum). This is the same code, which had been assigned, manually or automatically, when creating the new prospect record. This code is also used for naming prospect folders as well as in codes for quotes. You can also load the prospect's logo here. It will be displayed above their country's flag. ·Name — click this button to edit this prospect's name. This name can be up to 150 characters long. ·Postal Address — click this button to add or change the postal address of the prospect. See the Postal Address of Prospect topic for details. ·Contact Info button — allows you to add or change the contact information of the prospect. See the General Contact Information topic for more details. ·Web — opens the Edit Web Links dialog box, providing fields to enter your prospect's web site address (URL), as well as their LinkedIn, Facebook, and Twitter accounts. Click the address or the social media icons to open the corresponding links in your Internet browser.. ·Payment Terms — allows you to specify payment terms for each prospect, and their minimum fees once the prospect is converted into a full client. See the Payment Terms of Prospect topic for more details. · VAT Number — enter the prospect's legal tax number to have it automatically displayed and printed on invoices. ·Prospect Folder — this part of prospect's profile can be used to store and access the prospect files. Click the Folder button on the right side of the field to open the folder in the TO3000 Explorer (creating it if it does not exist yet). ·Prospect Currency — this currency will be used to issue quotes to this prospect. All the financial records for this prospect are kept in both your base currency and the prospect's currency, converted according to the exchange rates you set. ·Invoicing Policy — by adjusting the invoicing policy you determine the conditions upon which TO3000 3D+ will prompt you to invoice jobs once the prospect is converted into a full client. See the Invoicing Policy of Prospect topic for more details. ·General Information — any additional information which did not fit into any of the other sections can be entered here. ·FTP connections — you can set the parameters for access to the prospect's FTP folders. Shortcuts to these folders will be automatically added to the Files tab in this prospect's window. See the Prospect FTP Connections topic for details.
Custom data The prospect database can be customized by adding custom fields. Any custom fields that have been added to the prospects database, can be accessed by clicking Custom Fields tab, next to the Prospect Profile tab.
See also:
|